Create your RStudio on Amazon SageMaker licensed or trial setting in three straightforward steps
RStudio on Amazon SageMaker is the primary absolutely managed cloud-based Posit Workbench (previously referred to as RStudio Workbench). RStudio on Amazon SageMaker removes the necessity so that you can handle the underlying Posit Workbench infrastructure, so your groups can focus on producing worth for your corporation. You possibly can shortly launch the acquainted RStudio built-in improvement setting (IDE) and scale up and down the underlying compute sources with out interrupting your work, making it straightforward to construct machine studying (ML) and analytics options in R at scale.
Organising a brand new Amazon SageMaker Studio area with RStudio assist or including RStudio to an current area is now simpler, because of the service integration with AWS Marketplace and AWS License Manager. Now you can purchase your new Posit Workbench license or request a trial instantly from AWS Market and arrange your setting utilizing the AWS Management Console. On this publish, we stroll you thru this course of in three easy steps:
- Purchase a Posit Workbench license or request a time-bound trial in AWS Marketplace.
- Create a license grant in License Supervisor to your AWS account.
- Provision a brand new Studio area with RStudio or add RStudio to your current area.
Stipulations
Earlier than starting this walkthrough, be sure to have the next conditions:
Step 1: Purchase your Posit Workbench license
To accumulate your Posit Workbench license, full the next steps:
- Log in to your AWS account and navigate to the AWS Market console.
- Within the navigation pane, select Uncover Merchandise.
- Seek for Posit, then select Posit Workbench and select Proceed to Subscribe.

Fig 1: Posit Workbench product web page on AWS market
- Specify your settings for Contract period, Renewal Settings, and Contract choices, then select Create Contract.

Fig 2: Posit Workbench product settlement web page on AWS market
You will note a message stating your request is being processed. This step will take a couple of minutes to finish.

Fig 3: AWS Market handle subscriptions web page
After jiffy, you see the RStudio Workbench product underneath your subscriptions.
Request a trial license
If you wish to create a check setting or a proof of idea, you should use the Posit Workbench product page to request a trial license. Full the next steps:
- Find the analysis request kind hyperlink on the Overview tab in AWS Market.

Fig 4: Contact from hyperlink in Posit Workbench product web page
- Fill out the contact kind and be sure to embody your AWS account ID within the How we might help? immediate.
This is essential as a result of that may permit you to get the trial license personal provide on to your e-mail with none extra backwards and forwards.
You’ll obtain an e-mail with a hyperlink to a $0 limited-time personal provide that you may open whereas logged in to your AWS account. After you settle for the provide, it is possible for you to to comply with the subsequent steps to activate your license grant.
Step 2: Handle your license grant in License Supervisor
To activate your license grant, full the next steps:
- Navigate to the License Supervisor console to view the Posit Workbench license.
- When you’re utilizing License Supervisor for the primary time, it’s essential to grant permission to make use of License Supervisor by deciding on I grant AWS License Supervisor the required permissions and selecting Grant permissions.
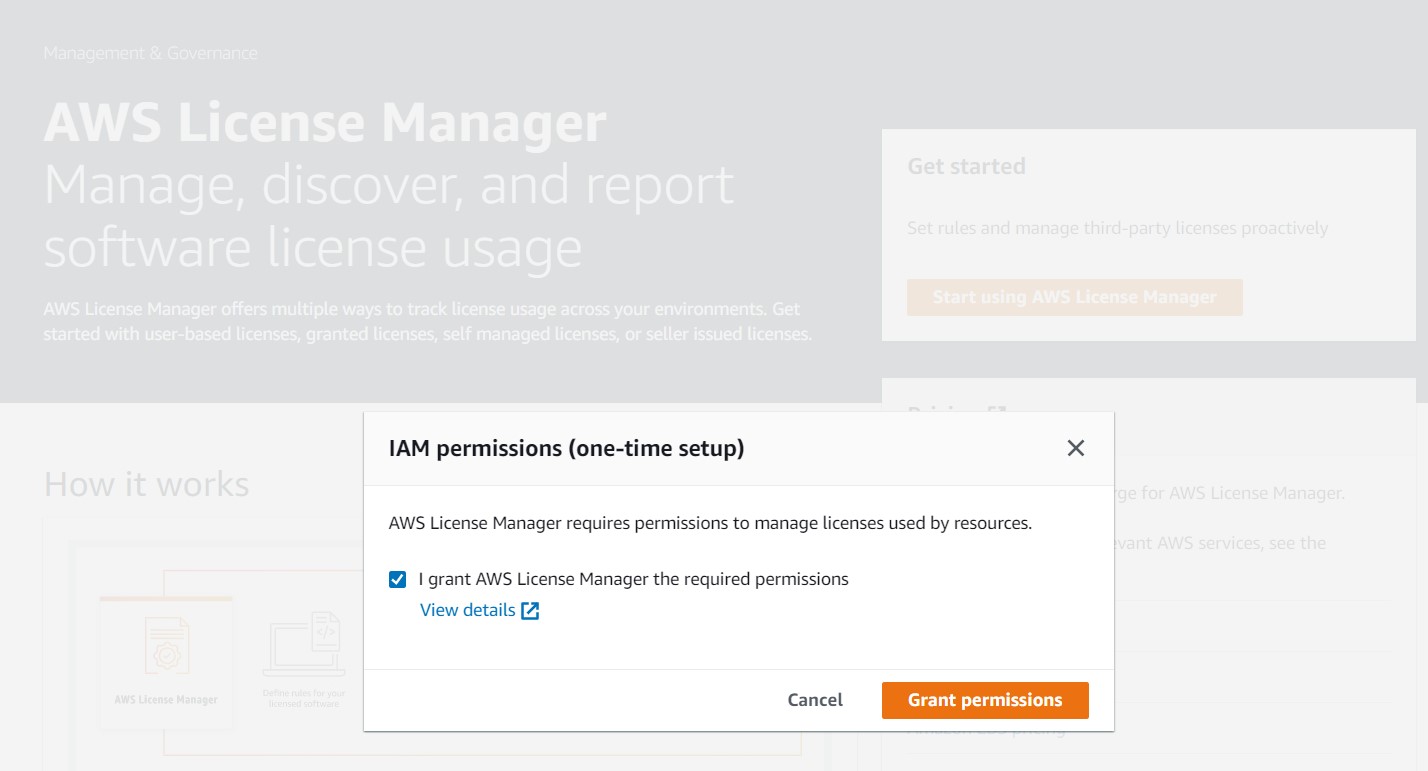
Fig 5: AWS License Supervisor one-time setup web page for IAM Permissions
- Select Granted licenses within the navigation pane.
You possibly can see two entitlements associated to Posit Workbench: one for AWS Market utilization and the opposite for named customers. So as to have the ability to use your license and create a Studio area with RStudio assist, it’s essential to settle for the license.
- On the Granted licenses web page, choose the license grant with RStudio Workbench because the product title and select View.
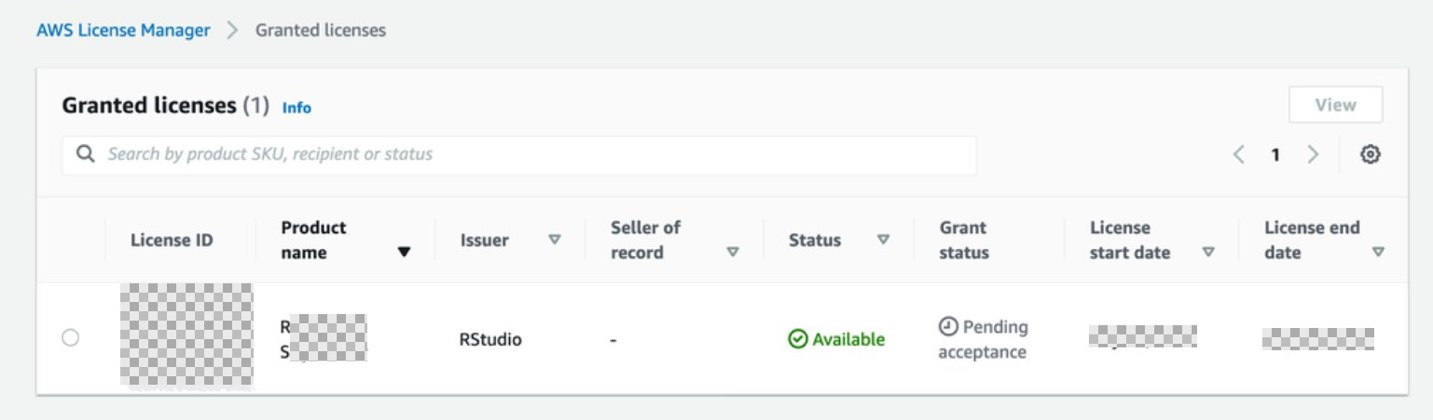
Fig 6: AWS License Supervisor console with Granted licenses
- On the license element web page, select Settle for & activate license.
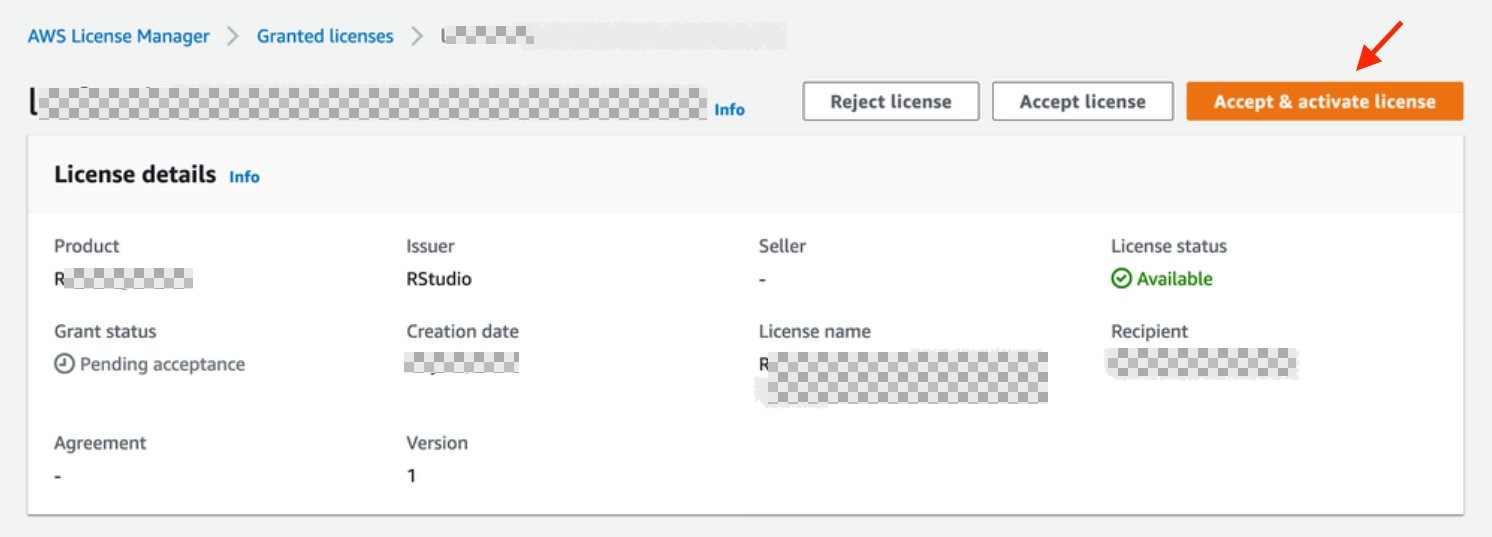
Fig 7: AWS License Supervisor console with License particulars
You probably have a single account and need to create your Studio area in the identical account you’re managing your license, you’ll be able to leap to Step 11. Nonetheless, it’s an AWS recommended best practice to make use of a multi-account AWS setting the place you’ve a devoted shared providers account to handle your licenses. If that’s the case, it’s essential to create a license grant for the AWS account the place you’ll create the Studio area with RStudio.
- Within the navigation pane, select Granted licenses, then select the license ID to open the license particulars web page.
- Within the Grants part, select Create grant.
- Enter a reputation and AWS account ID of the grant recipient (the AWS account the place you’ll create your RStudio-enabled Studio area).
- Select Create grant.

Fig 8: Create grant web page in AWS License Supervisor console
- Log in to the AWS account the place you’ll arrange your RStudio on Amazon SageMaker area and navigate to the License Supervisor console to just accept and activate the granted license that seems as Pending acceptance.
The standing modifications to Lively if you settle for the grant or Rejected in any other case.
- Select the license ID to see the main points of the license.
- Select Settle for & activate license.

Fig 9: Amazon License Supervisor console with license standing obtainable
The license standing modifications to Out there.
- To finalize, select Activate license.

Fig 10: Amazon License Supervisor console with energetic license standing
Now that you’ve got accepted your Posit Workbench license, you’re able to create your RStudio on Amazon SageMaker area. Your license might be consumed by RStudio on Amazon SageMaker in any AWS Area that helps the function.
Stipulations to create a SageMaker area
RStudio on Amazon SageMaker requires an IAM execution position that has permissions to License Supervisor and Amazon CloudWatch. For directions, consult with Create DomainExecution role.
It’s also possible to use the next AWS CloudFormation stack template that creates the required IAM execution position in your account. Full the next steps:
- Select Launch Stack:
![]()
The hyperlink takes you to the us-east-1 Area, however you’ll be able to change to your most popular Area. IAM roles are international sources, so you’ll be able to entry the position in any Area.
- Within the Specify template part, select Subsequent.
- Within the Specify stack particulars part, for Stack title, enter a reputation and select Subsequent.
- Within the Configure stack choices part, select Subsequent.
- Within the Assessment part, choose I acknowledge that AWS CloudFormation would possibly create IAM sources and select Create stack.
- When the stack standing modifications to
CREATE_COMPLETE, go to the Assets tab to seek out the IAM position you created.
Step 3: Create a Studio area with RStudio
You possibly can configure RStudio on Amazon SageMaker as a part of a multi-step SageMaker area creation course of on the console. It’s also possible to carry out the steps utilizing the AWS Command Line Interface (AWS CLI) following the directions on Create an Amazon SageMaker Domain with RStudio using the AWS CLI. To create your area on the console, full the next steps:
- On the SageMaker console, on the Setup SageMaker Area web page, select Commonplace setup , and select Configure.

Fig 11: Amazon SageMaker area creation
- In Step 1 of the Commonplace setup, you have to to offer:
- Your area title.
- Your chosen authentication technique (IAM or AWS Identification Middle)
- Your area execution position (see the pre-requisites part above).
- Your community and storage choice.
- In Step 2 you’ll present configuration of your Studio Jupyter Lab setting (you’ll be able to hold the default values and proceed).
- In Step 3, Studio robotically detects your RStudio Workbench license after it’s added and accepted in License Supervisor, as seen under.

Fig12: Amazon SageMaker area creation – normal settings
You possibly can select the occasion kind for the RStudio server that’s going to be shared by all customers in your area. ml.t3.medium is really useful for Domains with low UI use and is free to make use of. For extra details about how to decide on an occasion kind, see RStudioServerPro occasion kind web page. Observe that this isn’t the occasion the place your R classes run their evaluation and ML code.
The area creation takes a few minutes. When it’s full, we will add customers for knowledge scientists to entry RStudio on SageMaker.
Add RStudio assist to an current Studio area
If you have already got a SageMaker area, you’ll be able to add RStudio assist by utilizing the update-domain API name from the AWS CLI. Full the next steps:
- Delete all apps in your SageMaker area. That is vital as a result of including RStudio will replace all of your current person profile safety teams.
- Receive an inventory of all current apps by working the next command:
- Then delete each app by working the next command:
- Activate RStudio by updating your area. Relying on the kind of networking you’ve arrange your area with, you’ll select between the next code examples:
- In case your area is in
VPCOnlymode: - In case your area is in
PublicInternetOnlymode:
- In case your area is in
Necessary: You probably have modified the safety teams for current person profiles in your area, you must make a further replace to be sure to don’t run into the utmost variety of safety teams per Elastic Community Interface restrict. For extra data, consult with Add RStudio support to an existing Domain.
- Now you can begin including new person profiles to your area with RStudio assist (by default, they may have entry to RStudio). It’s also possible to add RStudio entry to pre-existing person profiles. That is vital as a result of, by default, pre-existing person profiles within the area should not granted entry to RStudio on SageMaker.
- Run the next command so as to add RStudio entry to current person profiles:
Create a Studio area person profile
Making a person in your Studio area permits entry to each Studio and RStudio on SageMaker. You possibly can configure each on the SageMaker console. When you desire to make use of the AWS CLI to arrange a person, consult with Manage users. To allow RStudio for a person through the console, full the next steps:
- On the Area particulars web page, select Add person.
- For Title, enter a person title.
- For Default execution position, create the person profile’s execution position.
- Select Subsequent.

Fig 13: Amazon SageMaker Add person– Common Settings tab
- Subsequent, you’ll be able to configure the entry to SageMaker project templates and JumpStart. You possibly can hold it default despite the fact that we don’t use this function on this publish; you’ll be able to all the time edit it later.
- Select Subsequent to proceed.
- For License Authorization, Studio robotically detects and provides RStudio Workbench licenses to the area so that you can select from:
-
- RStudio Admin – Has entry to the RStudio IDE and RStudio administrative dashboard
- RStudio Consumer – Has entry to the RStudio IDE
- Unauthorized – Doesn’t have entry to the RStudio IDE
Observe that each one choices grant entry to Studio.
- Select both RStudio Admin or RStudio Consumer and select Subsequent to proceed.
- Select Submit.
The person profile creation takes lower than a minute.

Fig 14: Amazon SageMaker Add person – RStudio setting tab
- To open RStudio on SageMaker, on the Launch app menu within the person checklist, select RStudio.

Fig 15: Amazon SageMaker Area customers
You will note the RStudio Workbench dwelling web page and an inventory of classes, tasks, and printed content material.
- To create a brand new session, select New Session.
- Select a desired occasion on the Occasion Sort menu and select Begin Session.

Fig 16: Creating a brand new RStudio session in RStudio workbench
Whenever you launch your RStudio session, the Base R picture serves as the idea of your occasion. This Docker picture contains R v4.0, AWS instruments equivalent to awscli, sagemaker, and boto3 Python packages, and the reticulate package deal for the interoperability between Python and R.

Fig 17: RStudio Workbench session
Clear up
As a part of this walkthrough, you provisioned a SageMaker area, person profiles, and RStudio session. To delete these sources, consult with Delete an Amazon SageMaker Domain.
Conclusion
On this publish, we confirmed how one can simply arrange your RStudio on Amazon SageMaker setting in three easy steps. Now you can both purchase a brand new paid Posit Workbench license or request a trial instantly from AWS Market and shortly import your license utilizing License Supervisor. We additionally confirmed you the way, after you settle for the license grant, Studio robotically detects your new license and means that you can create a Studio area with Posit Workbench assist. We encourage you to check out RStudio on Amazon SageMaker as we speak by following these steps and provides us your suggestions within the feedback part!
Concerning the Authors
 Venkata Kampana is a Senior Options Architect within the AWS Well being and Human Providers staff and relies in Sacramento, CA. In that position, he helps public sector clients obtain their mission goals with well-architected options on AWS.
 Eric Peña is a Senior Technical Product Supervisor within the AWS Synthetic Intelligence Platforms staff, engaged on Amazon SageMaker Interactive Machine Studying. He at the moment focuses on IDE integrations on SageMaker Studio. He holds an MBA diploma from MIT Sloan and out of doors of labor enjoys taking part in basketball and soccer.