Methods to Deploy Machine Studying fashions? Finish-to-Finish Canine Breed Identification Venture! | by Gurami Keretchashvili | Apr, 2023
Easiest solution to deploy your ML mannequin on the internet.
On this article I’ll talk about step-by-step tutorial in regards to the best and quickest solution to deploy your ML venture on the internet utilizing Streamlit. The venture is about canine breed identification, which classifies a canine out of 120 forms of breeds. I’ll focus extra on the deployment a part of the venture, moderately than constructing a posh machine studying mannequin.
Earlier than discussing any additional, let’s see the demo of the venture under:

You may play with the demo — HERE,
The GitHub hyperlink of the venture is available-HERE
Define of the article:
- Background
- Venture tutorial
A. Construct and Practice mannequin (Build_AND_Save_DL_model.ipynb)
B. Streamlit utility (streamlit.py)
C. Deployment - Widespread errors and troubleshooting
- Conclusion and future work
Constructing machine studying mannequin within the Jupyter pocket book is one factor and deploying the mannequin is — one other, that requires making a service that one other person can entry over the web. There are many strategies and instruments to deploy an ML mannequin, reminiscent of constructing REST API with light-weight internet framework like Flask or Django. The API will be referred to as from an internet or cell utility to get prediction from the mannequin. As well as, you possibly can deploy ML fashions as serverless capabilities utilizing platforms reminiscent of Google Cloud Features or AWS Lambda. Additionally, you possibly can bundle machine studying mannequin and dependencies right into a docker container and deploy it to a sure administration platform reminiscent of Docker Swarm or Kubernetes. Deployment choices are rely upon venture wants, reminiscent of funds, scalability and efficiency. Primarily based on these wants, the developer ought to select the strategies. In our case, we construct a machine studying mannequin utilizing Streamlit, which is a python framework for constructing knowledge science internet purposes. We may even use the identical free Streamlit platform to host it.
The venture repository accommodates following information/folders.

Two essential information:
A. Build_AND_Save_DL_model.ipynb -> practice and save ML mannequin.
B. Streamlit.py -> Construct interactive internet app utilizing Streamlit and make customized prediction.
Different information/folders:
- knowledge -> The folder shops customized datasets and canine breed names (Coaching dataset is giant you possibly can download it from Kaggle immediately)
- pretrained_models -> Shops pretrained wonderful tuned efficientnet3 mannequin.
- README.md -> Textual content about venture data
- custom_prediction.ipynb -> (Non-compulsory) Experimental Jupiter pocket book which does customized inference on the pretrained mannequin.
- necessities.txt -> Bundle necessities to make inference on the Streamlit web site.
- Import libraries and helper capabilities.
I used google Colab which has python libraries already put in.
# I take advantage of tensorflow 2.9.1 model to coach mannequin
!pip set up tensorflow==2.9.1import pandas as pd
import pickle
from PIL import Picture
from google.colab import drive
import matplotlib.pyplot as plt
import matplotlib.picture as mpimg
import tensorflow as tf
import numpy as np
import zipfile
import os
import warnings
import shutil
import seaborn as sns
import random
from tensorflow.keras import layers
from tensorflow.keras.layers.experimental import preprocessing
warnings.filterwarnings("ignore")
drive.mount('/content material/gdrive')
print(tf.__version__)
def unzip_data(filename):
"""
Unzips filename into the present working listing.
Args:
filename (str): a filepath to a goal zip folder to be unzipped.
"""
zip_ref = zipfile.ZipFile(filename, "r")
zip_ref.extractall()
zip_ref.shut()
def plot_value_count(df, column):
"""
plots worth rely of dataframe column
"""
sns.set(type='darkgrid')
plt.determine(figsize= (20,10))
sns.countplot(x=column, knowledge=df, order = df[column].value_counts().index)
plt.xticks(rotation=90)
plt.present()
unzip_data("/content material/gdrive/MyDrive/dog-breed-identification/dog-breed-identification.zip")
If you happen to attempt to practice the mannequin regionally, ensure you create a brand new python digital atmosphere utilizing batch script:
python -m venv /path/to/new/digital/atmosphere
after which set up libraries so as to not occur bundle dependencies points.
2. Perceive the information
Constructing ML fashions is essential, however beforehand it’s essential to visualise the information and its statistics. Let’s see what’s the whole variety of coaching and take a look at samples and whole variety of canine breed. Additionally, we visualize every canine breed frequency.
labels_df=pd.read_csv('labels.csv')train_images = os.listdir("/content material/practice/")
test_image = os.listdir("/content material/take a look at/")
# what number of canine breed?
target_labels = sorted(labels_df['breed'].distinctive().tolist())
print('practice label form:', labels_df.form)
print('practice dataset and take a look at dataset sizes:',len(train_images), len(test_image))
print('whole variety of canine breeds: ',len(target_labels))
# lets plot distribution of canine breeds in coaching knowledge
plot_value_count(labels_df, 'breed')


3. Create Structured of the information
The uncooked knowledge solely contained photographs of all of the breeds in a single folder, subsequently, I created every folder for every breed to create a particular format to retailer the information and cargo it later.
# 1.create class folders
parent_folder = "knowledge"
datasets = ["all_data"]
for i in datasets:
for j in target_labels:
os.makedirs(parent_folder + "/" + i + "/" + j,  exist_ok=True)# all knowledge
for _, identify, label in labels_df.itertuples():
original_path = "/content material/practice/" + identify +".jpg"
dest_path = "/content material/knowledge/all_data/" + label
shutil.copy(original_path, dest_path)
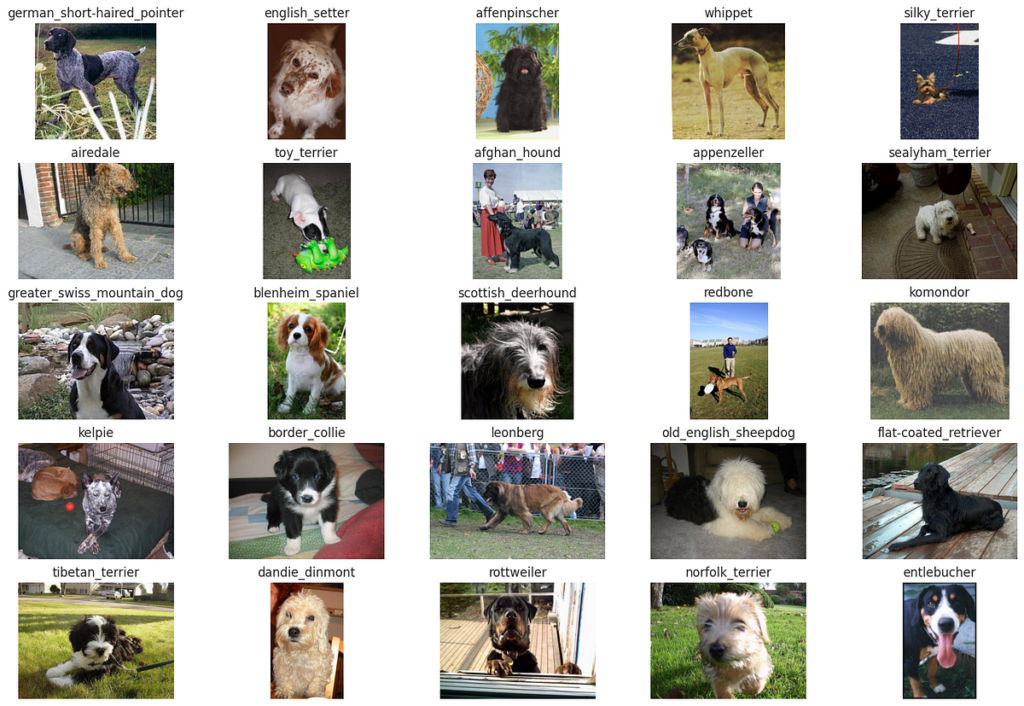
4. Visualize Random Photos
Right here I simply visualize the coaching random coaching photographs.
all_data_dir = "/content material/knowledge/all_data/"def view_25_random_image(target_dir, target_classes):
plt.determine(figsize=(18, 12))
random_images = []
for i, target_class in enumerate(target_classes):
# setup the goal listing
target_folder = target_dir + target_class
# get the random picture path
random_image = random.pattern(os.listdir(target_folder),1)
img = mpimg.imread(target_folder + "/" + random_image[0])
#print(target_folder + "/" + random_image[0])
#print(random_image)
plt.subplot(5,5,i+1)
plt.imshow(img)
plt.title(f"{target_class}")
plt.axis("off");
random_images.append(img)
#print(f"picture form: {img.form}")
return random_images
random_images = view_25_random_image(target_dir=all_data_dir,
target_classes = random.pattern(target_labels, 25))

5. Get The Knowledge
As we created particular knowledge storing format, we will simply generate tensorflow dataset from the picture folder.
tf.random.set_seed(42)
IMG_SIZE  = (256,256)
IMG_SHAPE = IMG_SIZE +(3,)
BATCH_SIZE = 32
data_all = tf.keras.preprocessing.image_dataset_from_directory(all_data_dir,
label_mode = "categorical",
image_size=IMG_SIZE,
batch_size=BATCH_SIZE,
)
print(f"all_data batches: {len(data_all)}")
6. Practice the mannequin
I take advantage of a number of knowledge augmentation strategies, reminiscent of RandomFlip, RandomCrop, Randomrotation, and so on. Additionally, I take advantage of two callbacks, reminiscent of scale back the training fee callback, that reduces studying fee when validation accuracy stops enhancing and early stopping, which stops coaching after validation accuracy doesn’t enhance anymore. Cut back studying fee helps the mannequin to converge extra slowly and subsequently doubtlessly discover a higher and extra generalizable resolution. Whereas, early stopping helps the mannequin to keep away from overfitting and cease coaching earlier. As for the ML mannequin structure, I used pretrained EfficientNetB3 mannequin after which I wonderful tuned with our new knowledge. EfficientNetB3 is a convolutional neural community structure that was proposed in 2019 by Tan et al. that achieved state-of-the-art accuracy whereas utilizing fewer parameters and fewer computational assets than different ML fashions.
#knowledge augmentation
data_augmentation_layer = tf.keras.fashions.Sequential([
preprocessing.RandomFlip("horizontal"),
preprocessing.RandomCrop(height=224, width=224),
preprocessing.RandomRotation(0.2),
preprocessing.RandomZoom(0.1),
preprocessing.RandomContrast(factor=0.1),
])# EarlyStopping Callback (cease coaching in val accuracy not improves)
early_stopping = tf.keras.callbacks.EarlyStopping(monitor="val_accuracy",
endurance=5,
restore_best_weights=True)
#ReduceLROnPlateau Callback (Creating studying fee)
reduce_lr = tf.keras.callbacks.ReduceLROnPlateau(monitor="val_accuracy",
issue=0.2, # multiply the training fee by 0.2 (scale back by 5x)
endurance=2,
verbose=1, # print out when studying fee goes down
min_lr=1e-5)
baseline_model = tf.keras.purposes.EfficientNetB3(include_top=False)
# trainable freeze
baseline_model.trainable = False
inputs = tf.keras.Enter(form = IMG_SIZE+(3,), identify = "input_layer")
#x = data_augmentation_layer(inputs)
x = baseline_model(inputs, coaching=False) # weights whhich want to remain frozen, keep frozen
x = layers.GlobalAveragePooling2D(identify="global_average_pool_layer")(x)
x = layers.Dense(len(data_all.class_names))(x)
outputs = layers.Activation("softmax", dtype=tf.float32)(x)
model_0 = tf.keras.Mannequin(inputs, outputs)
train_size = int(0.9 * len(data_all))
print(train_size)
model_0.compile(optimizer=tf.keras.optimizers.Adam(),
loss="categorical_crossentropy",
metrics = ["accuracy"])
history_0 = model_0.match(data_all.take(train_size),
epochs=5,
validation_data = data_all.skip(train_size),
callbacks = [
early_stopping,
reduce_lr
])

7. Save the mannequin and sophistication names
That is the final step. After wonderful tuning the mannequin, I saved the educated mannequin and breed names to make use of them later.
#save mannequin
model_0.save('/content material/gdrive/MyDrive/dog-breed-identification/EfficientNetB3_Model.h5')breed_names = data_all.class_names
breed_names = [n.replace('_',' ').capitalize() for n in breed_names]
print(breed_names[0:3])
#save canine breed names
with open('/content material/gdrive/MyDrive/dog-breed-identification/class_names', 'wb') as fp:
pickle.dump(breed_names, fp)
- Import libraries, pretrained mannequin and breed class names
import streamlit as st
import tensorflow as tf
from tensorflow.keras.preprocessing.picture import load_img
from tensorflow.keras.preprocessing.picture import img_to_array
import pickle
import numpy as np
import pathlib
import matplotlib.pyplot as plt
from PIL import PictureIMG_SIZE = (256, 256)
IMG_SHAPE = IMG_SIZE +(3,)
#1. load mannequin
@st.cache_resource
def load_model():
return tf.keras.fashions.load_model('pretrained_models/EfficientNetB3_Model.h5')
loaded_model = load_model()
#2. load class names
with open ('knowledge/class_names', 'rb') as fp:
class_names = pickle.load(fp)
2. Create internet app
I create an interactive internet interface with the Streamlit scripts. I create the title of the net and file uploader object.
st.header("Canine Identification Utility")uploaded_file = st.file_uploader("Add a picture of your canine and establish its breed...", kind=['jpg', 'jpeg', 'png'])
3. Make prediction
When the file is uploaded, the picture is first resized after which fed into the loaded pretrained mannequin. If the prediction confidence rating is greater than 50%, one prediction consequence shall be proven on the prime of the picture, but when the utmost confidence is lower than 50%, two outcomes primarily based on the highest two highest confidence scores. On the finish of the web site, there’s a checklist of all 120 obtainable canine breeds that our mannequin is aware of.
# If a picture is uploaded, show it and make a prediction
if uploaded_file just isn't None:
img = Picture.open(uploaded_file).resize(IMG_SIZE)
img = np.array(img, dtype=np.float32)
img_g = np.expand_dims(img, axis=0)
custom_predict = loaded_model.predict(img_g)# Show the uploaded picture and the predictions
# st.write(f"{class_names[np.argmax(custom_predict[0])]} ({spherical(np.max(custom_predict[0]*100))}% confidence)")
if spherical(np.max(custom_predict[0]*100))>50:
st.write(f'<p type="font-size:26px; colour:inexperienced;"> {class_names[np.argmax(custom_predict[0])]} ({spherical(np.max(custom_predict[0]*100))}% confidence)</p> ', unsafe_allow_html=True)
else:
argsorts = np.argsort(custom_predict[0])
types = np.type(custom_predict[0])
st.write(f'<p type="font-size:26px; colour:pink;"> {class_names[argsorts[-1]]} ({spherical(types[-1]*100)}% confidence) OR {class_names[argsorts[-2]]} ({spherical(types[-2]*100)}% confidence)</p> ', unsafe_allow_html=True)
st.picture(img/255, use_column_width=True)
st.write('Notes:')
st.write('1. The mannequin is a primary easiest baseline model, the prediction consequence shall be improved in later variations')
st.write('2. The mannequin can establish as much as 120 forms of canine breeds')
possibility = st.selectbox(
'All Breeds',
class_names)
You may visualize lead to an area host by working the bash command
streamlit run Streamlit.py
C. Deployment
As all of the venture is created regionally, now it’s time to deploy it on the internet. This step is really easy.
- Add to GitHub
First, we add the next information/folders:
- Streamlit.py,
- pretrained_models/EfficientNetB3_Model.h5
- knowledge/class_names
- necessities.txt
in a GitHub repository.
2. Join GitHub repository to Streamlit.
After that, log in Streamlit web site, create account and press ‘New app’

and we simply observe directions

Listed below are some most possible error and proposed resolution throughout constructing a venture.
- Packaging dependency concern: It would occur for those who coaching the mannequin regionally, be sure that to create python digital atmosphere after which set up the libraries.
- Packaging bugs: When utilizing Google Colab, some Tensorflow variations had concern throughout saving a mannequin, subsequently use model 2.9.1 of Tesnorflow in Google Colab.
- Streamlit utility doesn’t work after connecting the GitHub account: It’s primarily due to lack of packages. Be sure you have necessities.txt file uploaded within the GitHub with particular packages. Streamlit will routinely search for the file and set up all of the required packages to run the appliance.
In abstract, I’ve developed a easy deep studying mannequin that identifies canine out of 120 breeds. Additionally, I hosted the mannequin on the internet utilizing Streamlit. The mannequin achieves about 94% accuracy on validation knowledge, which is a reasonably first rate consequence. Although the mannequin works nicely, it has some drawbacks. For instance, the mannequin confidence rating just isn’t calibrated, that signifies that the boldness rating doesn’t characterize actual prediction likelihood. Additionally, the mannequin solely is aware of 120 canine breeds, so it cannot establish all of the canine breeds. As well as, the mannequin doesn’t know when it doesn’t know. For instance, for those who add the picture of an airplane, the mannequin cannot inform you that it isn’t a canine. I’ll attempt to overcome these points in a later model of the appliance.