Construct a serverless voice-based contextual chatbot for folks with disabilities utilizing Amazon Bedrock

At Amazon and AWS, we’re at all times discovering modern methods to construct inclusive expertise. With voice assistants like Amazon Alexa, we’re enabling extra folks to ask questions and get solutions on the spot with out having to sort. Whether or not you’re an individual with a motor incapacity, juggling a number of duties, or just away out of your pc, getting search outcomes with out typing is a helpful function. With fashionable voice assistants, now you can ask your questions conversationally and get verbal solutions immediately.
On this put up, we talk about voice-guided functions. Particularly, we concentrate on chatbots. Chatbots are not a distinct segment expertise. They’re now ubiquitous on customer support web sites, offering around-the-clock automated help. Though AI chatbots have been round for years, current advances of huge language fashions (LLMs) like generative AI have enabled extra pure conversations. Chatbots are proving helpful throughout industries, dealing with each common and industry-specific questions. Voice-based assistants like Alexa exhibit how we’re getting into an period of conversational interfaces. Typing questions already feels cumbersome to many preferring the simplicity and ease of talking with their gadgets.
We discover construct a totally serverless, voice-based contextual chatbot tailor-made for people who want it. We additionally present a pattern chatbot utility. The appliance is out there within the accompanying GitHub repository. We create an clever conversational assistant that may perceive and reply to voice inputs in a contextually related method. The AI assistant is powered by Amazon Bedrock. This chatbot is designed to help customers with varied duties, present info, and provide personalised assist primarily based on their distinctive necessities. For our LLM, we use Anthropic Claude on Amazon Bedrock.
We exhibit the method of integrating Anthropic Claude’s superior pure language processing capabilities with the serverless structure of Amazon Bedrock, enabling the deployment of a extremely scalable and cost-effective answer. Moreover, we talk about strategies for enhancing the chatbot’s accessibility and usefulness for folks with motor disabilities. The intention of this put up is to offer a complete understanding of construct a voice-based, contextual chatbot that makes use of the most recent developments in AI and serverless computing.
We hope that this answer may also help folks with sure mobility disabilities. A restricted degree of interplay remains to be required, and particular identification of begin and cease speaking operations is required. In our pattern utility, we deal with this by having a devoted Discuss button that performs the transcription course of whereas being pressed.
For folks with vital motor disabilities, the identical operation could be applied with a devoted bodily button that may be pressed by a single finger or one other physique half. Alternatively, a particular key phrase could be stated to point the start of the command. This strategy is used while you talk with Alexa. The consumer at all times begins the dialog with “Alexa.”
Answer overview
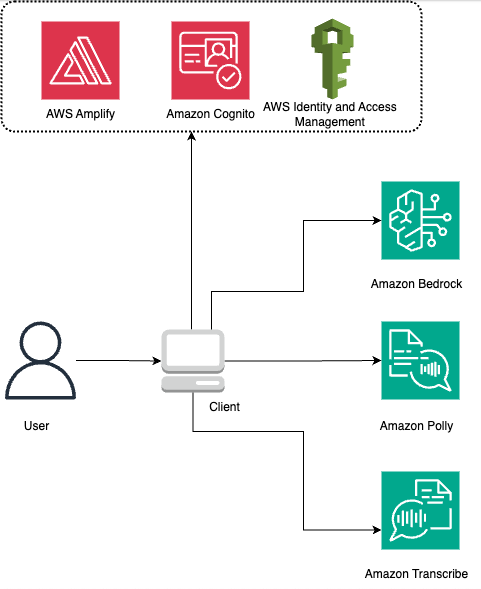
The next diagram illustrates the structure of the answer.
To deploy this structure, we want managed compute that may host the online utility, authentication mechanisms, and related permissions. We talk about this later within the put up.
All of the providers that we use are serverless and totally managed by AWS. You don’t must provision the compute sources. You solely eat the providers by way of their API. All of the calls to the providers are made immediately from the shopper utility.
The appliance is a straightforward React utility that we create utilizing the Vite construct software. We use the AWS SDK for JavaScript to name the providers. The answer makes use of the next main providers:
- Amazon Polly is a service that turns textual content into lifelike speech.
- Amazon Transcribe is an AWS AI service that makes it simple to transform speech to textual content.
- Amazon Bedrock is a totally managed service that gives a alternative of high-performing basis fashions (FMs) together with a broad set of capabilities that it’s essential construct generative AI functions.
- Amazon Cognito is an identification service for internet and cell apps. It’s a consumer listing, an authentication server, and an authorization service for OAuth 2.0 entry tokens and AWS credentials.
To eat AWS providers, the consumer must get hold of non permanent credentials from AWS Identity and Access Management (IAM). That is potential as a result of Amazon Cognito identity pool, which acts as a mediator between your utility consumer and IAM providers. The identification pool holds the details about the IAM roles with all permissions essential to run the answer.
Amazon Polly and Amazon Transcribe don’t require further setup from the shopper other than what we’ve described. Nevertheless, Amazon Bedrock requires named consumer authentication. Which means having an Amazon Cognito identification pool is just not sufficient—you additionally want to make use of the Amazon Cognito consumer pool, which lets you outline customers and bind them to the Amazon Cognito identification pool. To grasp higher how Amazon Cognito permits exterior functions to invoke AWS providers, seek advice from seek advice from Secure API Access with Amazon Cognito Federated Identities, Amazon Cognito User Pools, and Amazon API Gateway.
The heavy lifting of provisioning the Amazon Cognito consumer pool and identification pool, together with producing the sign-in UI for the React utility, is completed by AWS Amplify. Amplify consists of a set of instruments (open supply framework, visible growth setting, console) and providers (internet utility and static web site internet hosting) to speed up the event of cell and internet functions on AWS. We cowl the steps of setting Amplify within the subsequent sections.
Conditions
Earlier than you start, full the next stipulations:
- Be sure you have the next put in:
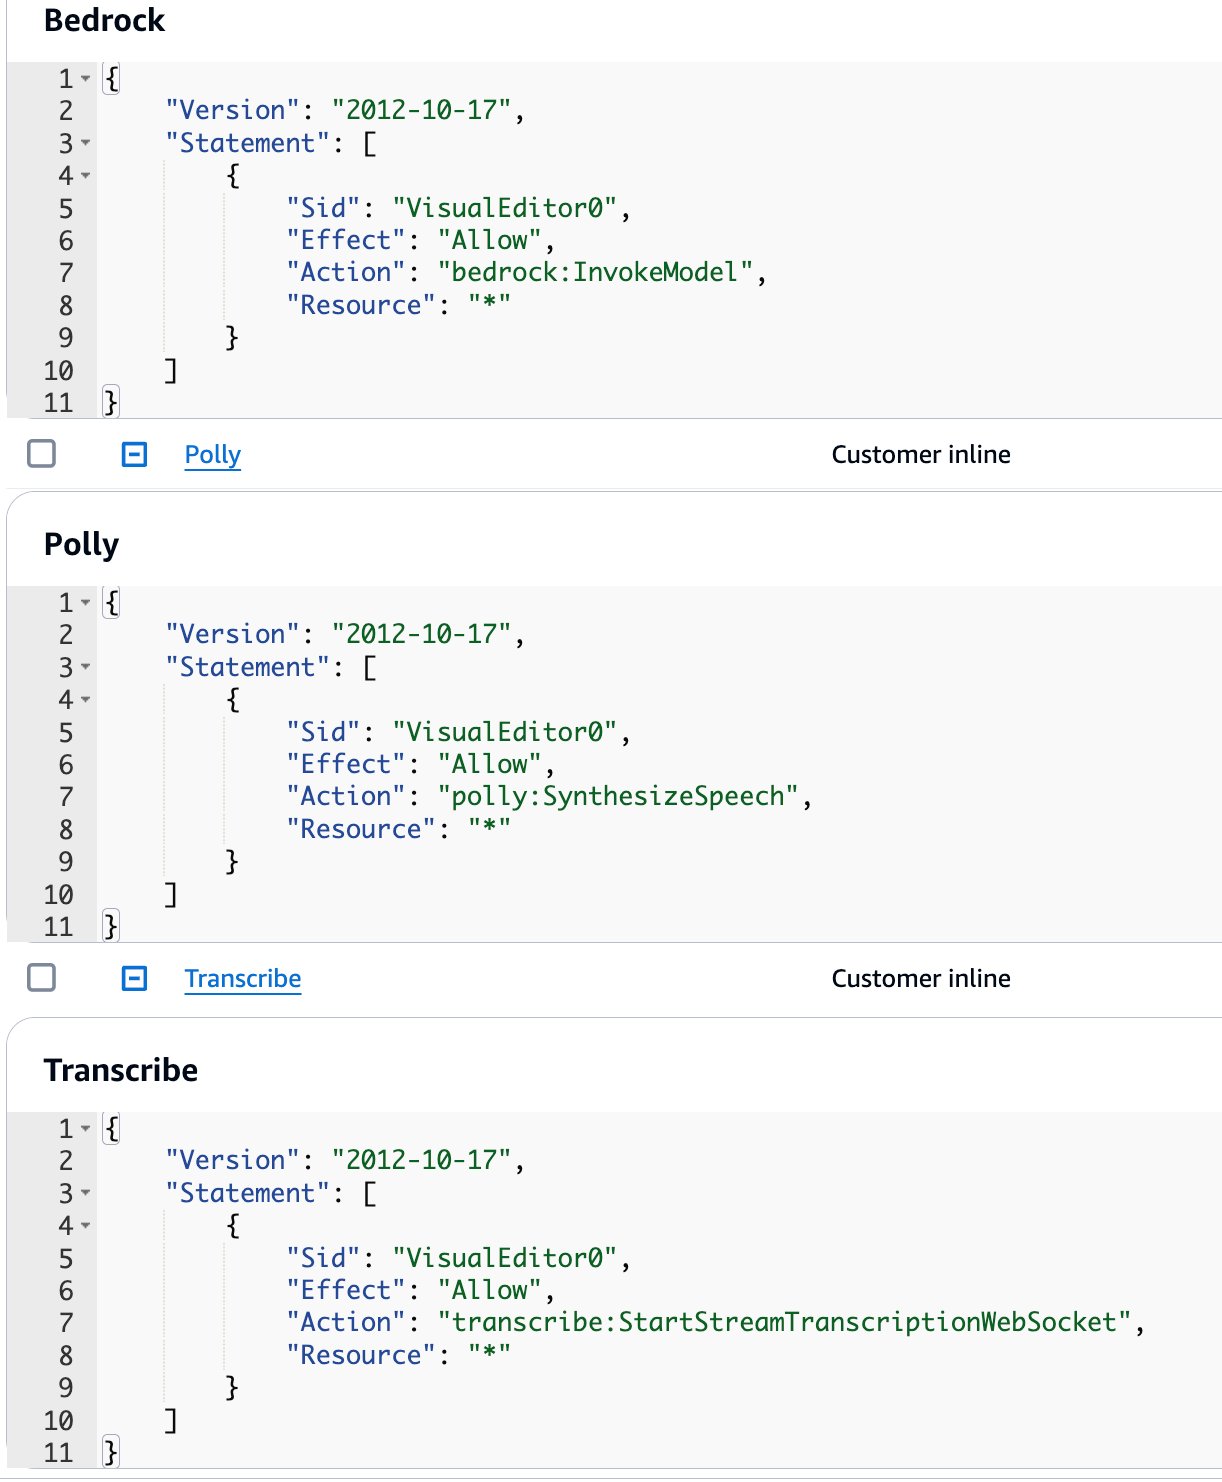
- Create an IAM position to make use of within the Amazon Cognito identification pool. Use the least privilege principal to offer solely the minimal set of permissions wanted to run the appliance.
- To invoke Amazon Bedrock, use the next code:
- To invoke Amazon Polly, use the next code:
- To invoke Amazon Transcribe, use the next code:
The total coverage JSON ought to look as follows:
- Run the next command to clone the GitHub repository:
- To make use of Amplify, seek advice from Set up Amplify CLI to finish the preliminary setup.
- To be in line with the values that you simply use later within the directions, name your AWS profile
amplifywhile you see the next immediate.
- Create the position
amplifyconsole-backend-rolewith theAdministratorAccess-Amplifymanaged coverage, which permits Amplify to create the mandatory sources.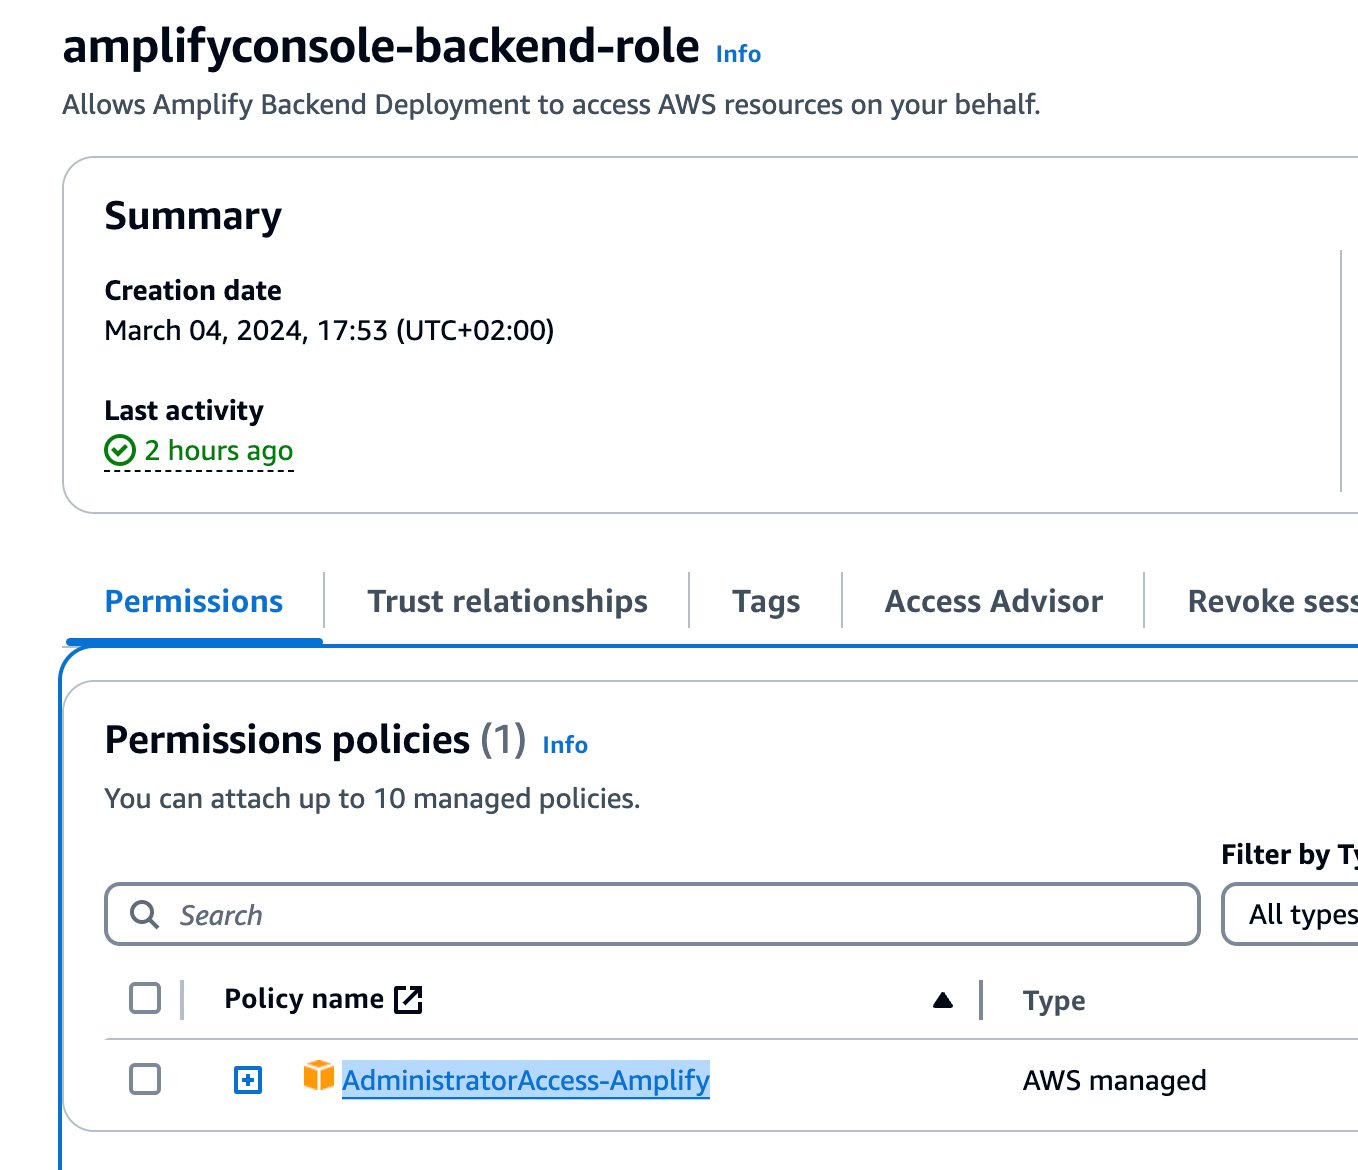
- For this put up, we use the Anthropic Claude 3 Haiku LLM. To allow the LLM in Amazon Bedrock, seek advice from Access Amazon Bedrock foundation models.
Deploy the answer
There are two choices to deploy the answer:
- Use Amplify to deploy the appliance routinely
- Deploy the appliance manually
We offer the steps for each choices on this part.
Deploy the appliance routinely utilizing Amplify
Amplify can deploy the appliance routinely if it’s saved in GitHub, Bitbucket, GitLab, or AWS CodeCommit. Add the appliance that you simply downloaded earlier to your most well-liked repository (from the aforementioned choices). For directions, see Getting started with deploying an app to Amplify Hosting.
Now you can proceed to the subsequent part of this put up to arrange IAM permissions.
Deploy the appliance manually
In the event you don’t have entry to one of many storage choices that we talked about, you possibly can deploy the appliance manually. This may also be helpful if you wish to modify the appliance to higher suit your use case.
We examined the deployment on AWS Cloud9, a cloud built-in growth setting (IDE) for writing, working, and debugging code, with Ubuntu Server 22.04 and Amazon Linux 2023.
We use the Visible Studio Code IDE and run all the next instructions immediately within the terminal window contained in the IDE, however you can even run the instructions within the terminal of your alternative.
- From the listing the place you checked out the appliance on GitHub, run the next command:
- Run the next instructions:
- Comply with the prompts as proven within the following screenshot.
- For authentication, select the AWS profile
amplifythat you simply created as a part of the prerequisite steps.
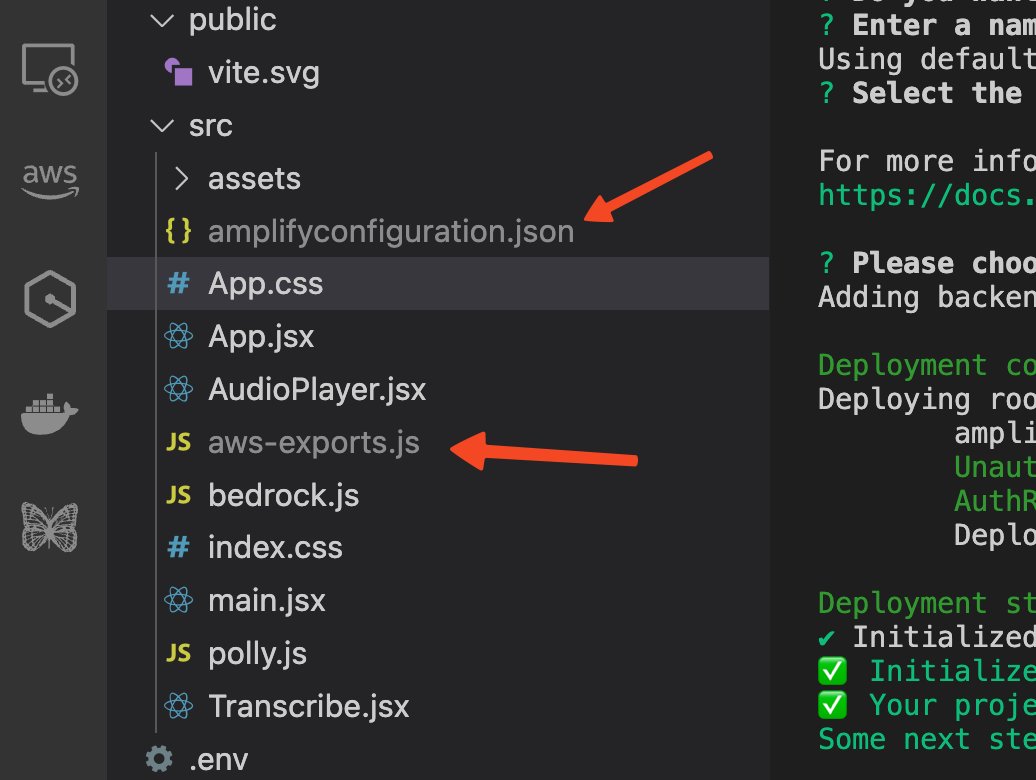
- Two new information will seem within the mission beneath the
srcfolder:amplifyconfiguration.jsonaws-exports.js
- For authentication, select the AWS profile
- Subsequent run the next command:
Then choose “Undertaking Info”

- Enter the next info:
You may use an existing Amazon Cognito identity pool and user pool or create new objects.
- For our utility, run the next command:
In the event you get the next message, you possibly can ignore it:
- Select Default configuration.

- Settle for all choices proposed by the immediate.
- Run the next command:
- Select your internet hosting possibility.
You’ve two choices to host the appliance. The appliance could be hosted to the Amplify console or to Amazon Simple Storage Service (Amazon S3) after which uncovered by way of Amazon CloudFront.
Internet hosting with the Amplify console differs from CloudFront and Amazon S3. The Amplify console is a managed service offering steady integration and supply (CI/CD) and SSL certificates, prioritizing swift deployment of serverless internet functions and backend APIs. In distinction, CloudFront and Amazon S3 provide larger flexibility and customization choices, notably for internet hosting static web sites and property with options like caching and distribution. CloudFront and Amazon S3 are preferable for intricate, high-traffic internet functions with particular efficiency and safety wants.
For this put up, we use the Amplify console. To study extra in regards to the deployment with Amazon S3 and Amazon CloudFront, seek advice from documentation.
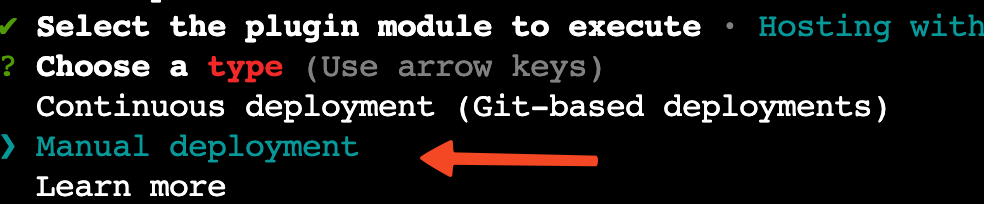
Now you’re able to publish the appliance. There’s an choice to publish the appliance to GitHub to assist CI/CD pipelines. Amplify has built-in integration with GitHub and might redeploy the appliance routinely while you push the modifications. For simplicity, we use handbook deployment.
- Select Guide deployment.
- Run the next command:
After the appliance is printed, you will notice the next output. Observe down this URL to make use of in a later step.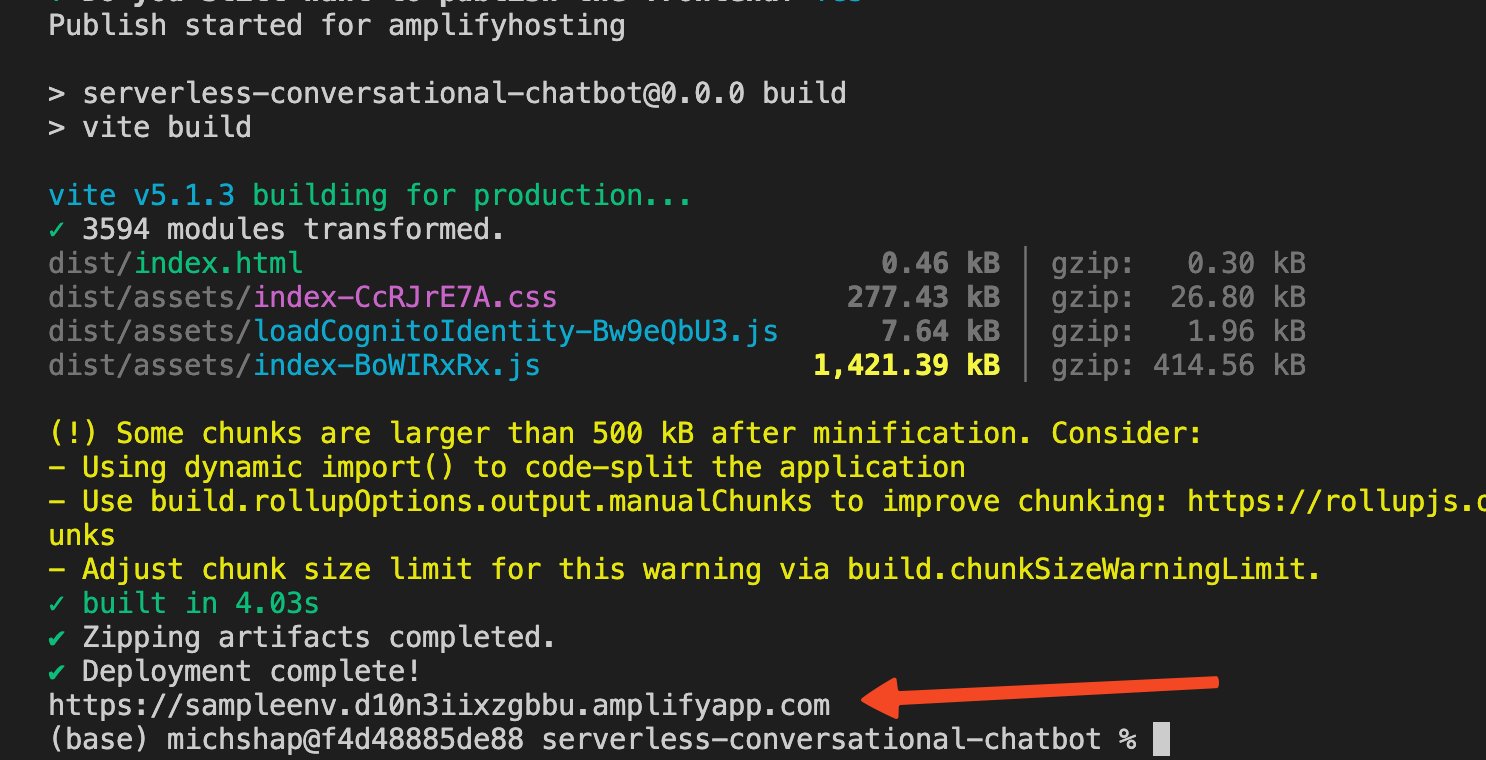
- Log in to the Amplify console, navigate to the
servrlsconvchatutility, and select Normal beneath App settings within the navigation pane.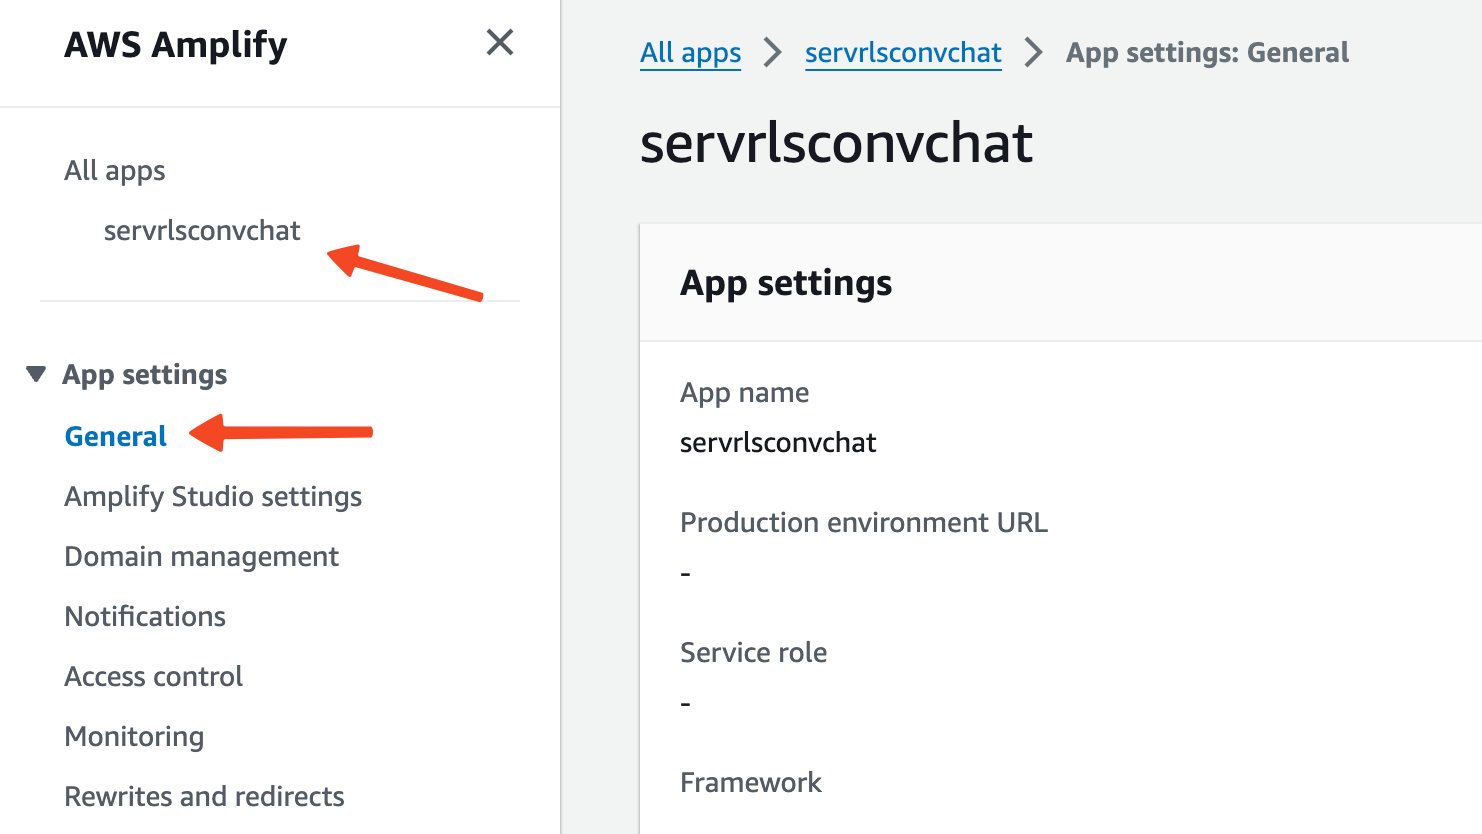
- Edit the app settings and enter
amplifyconsole-backend-rolefor Service position (you created this position within the stipulations part).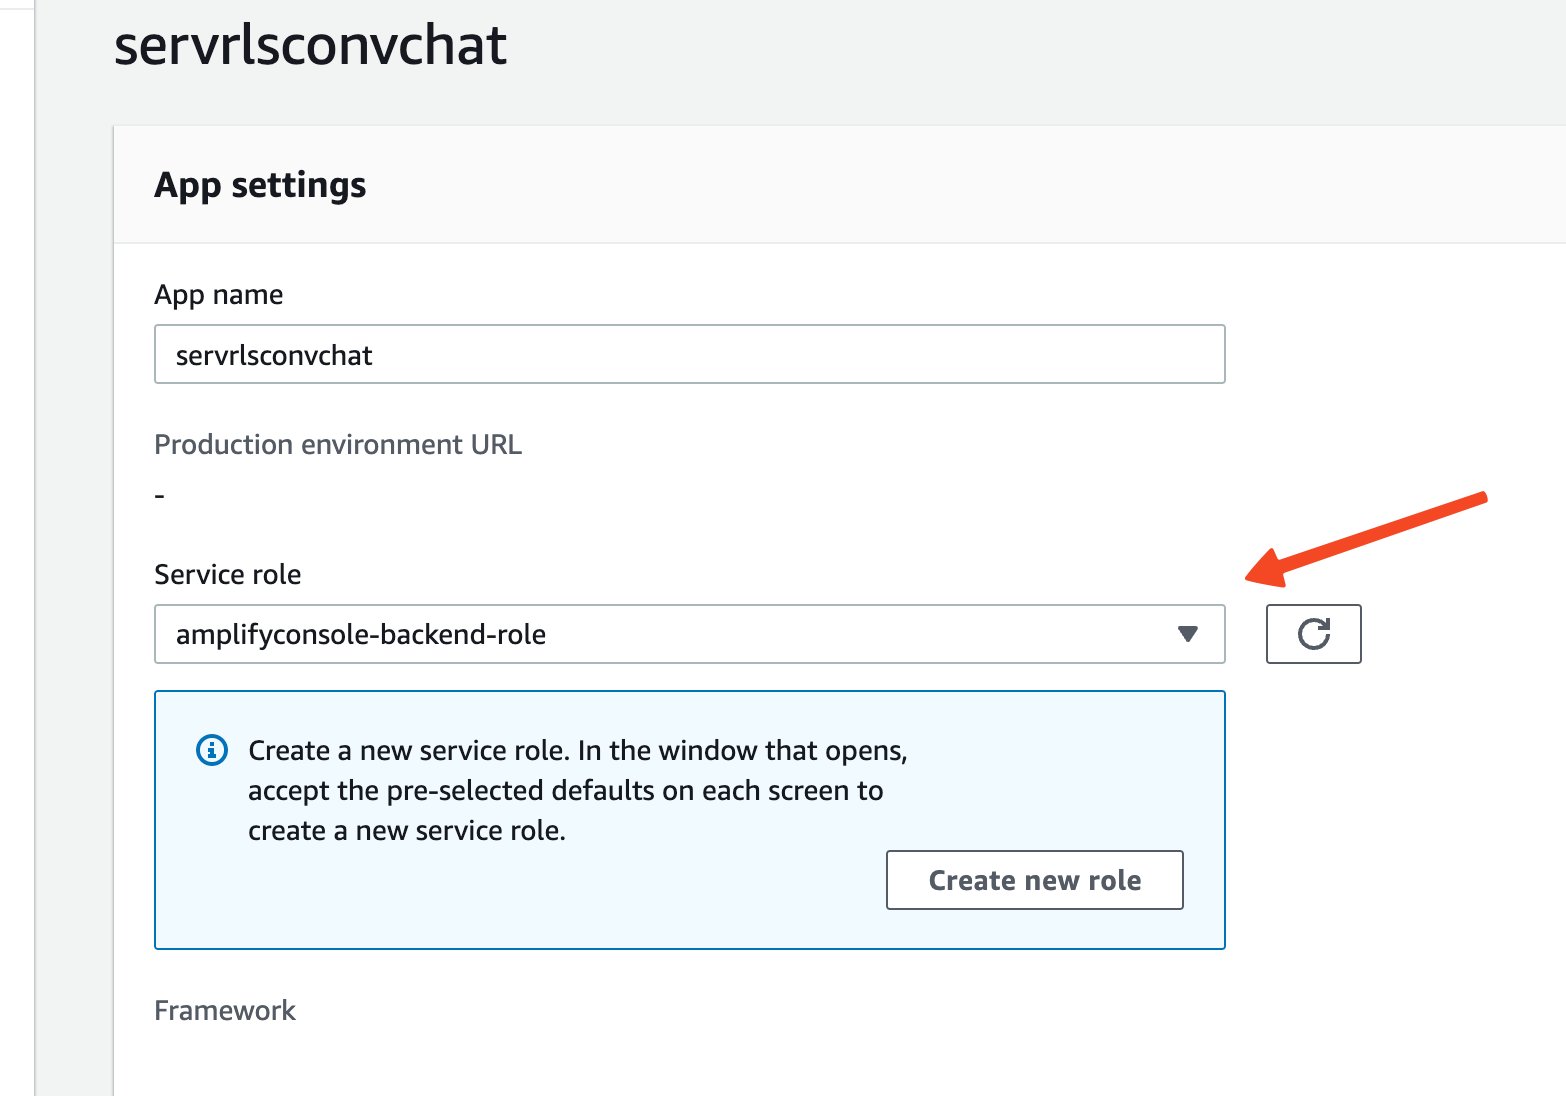
Now you possibly can proceed to the subsequent part to arrange IAM permissions.
Configure IAM permissions
As a part of the publishing technique you accomplished, you provisioned a brand new identification pool. You may view this on the Amazon Cognito console, together with a brand new consumer pool. The names will likely be totally different from these introduced on this put up.
As we defined earlier, it’s essential connect insurance policies to this position to permit interplay with Amazon Bedrock, Amazon Polly, and Amazon Transcribe. To arrange IAM permissions, full the next steps:
- On the Amazon Cognito console, select Identification swimming pools within the navigation pane.
- Navigate to your identification pool.
- On the Person entry tab, select the hyperlink for the authenticated position.
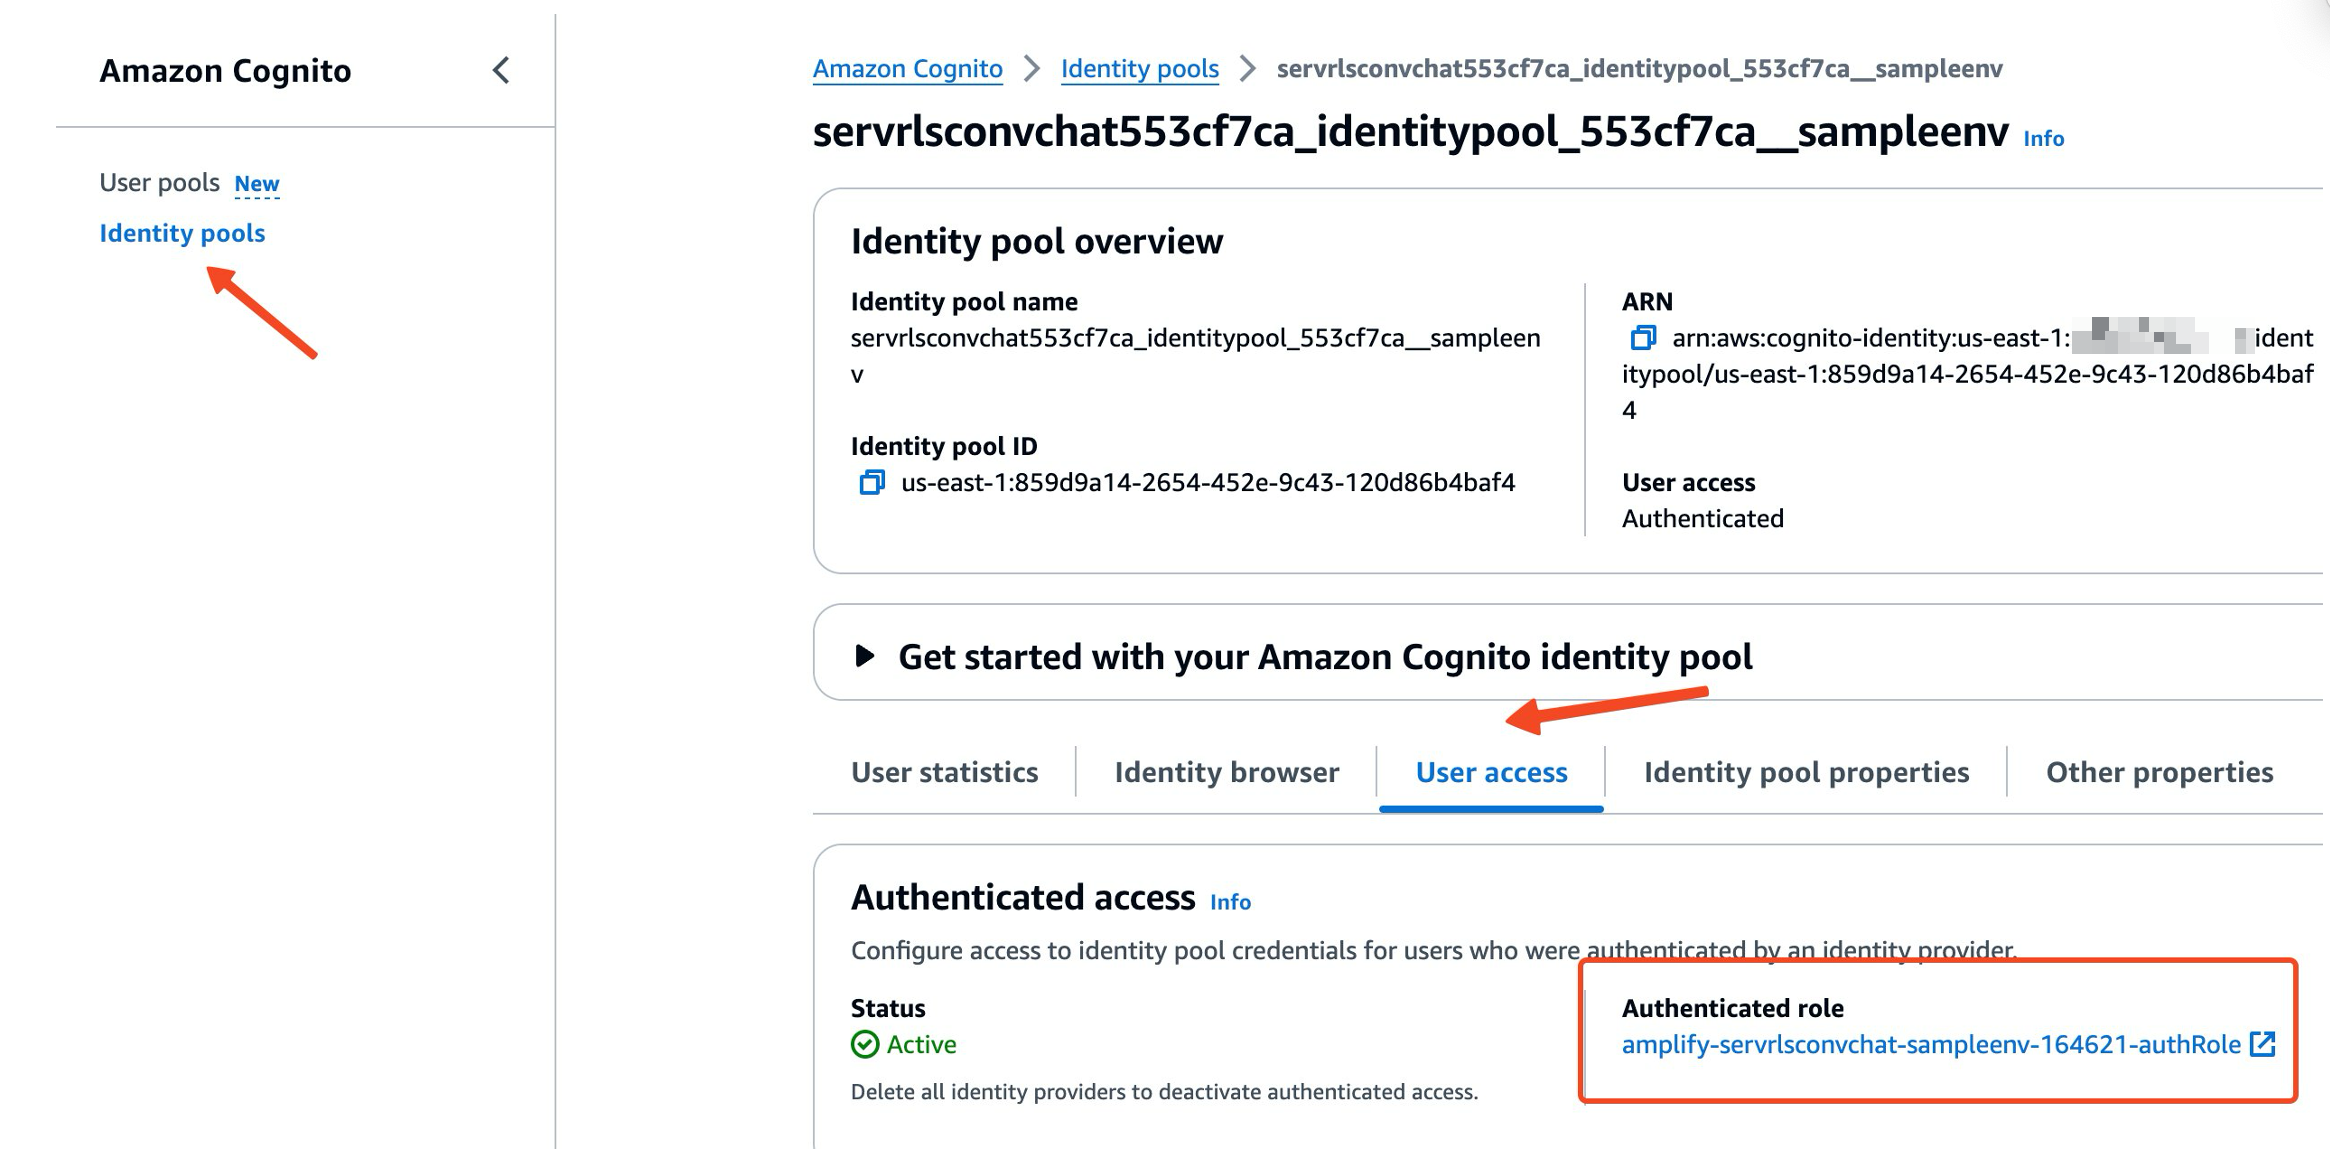
- Connect the insurance policies that you simply outlined within the stipulations part.
Amazon Bedrock can solely be used with a named consumer, so we create a pattern consumer within the Amazon Cognito consumer pool that was provisioned as a part of the appliance publishing course of.
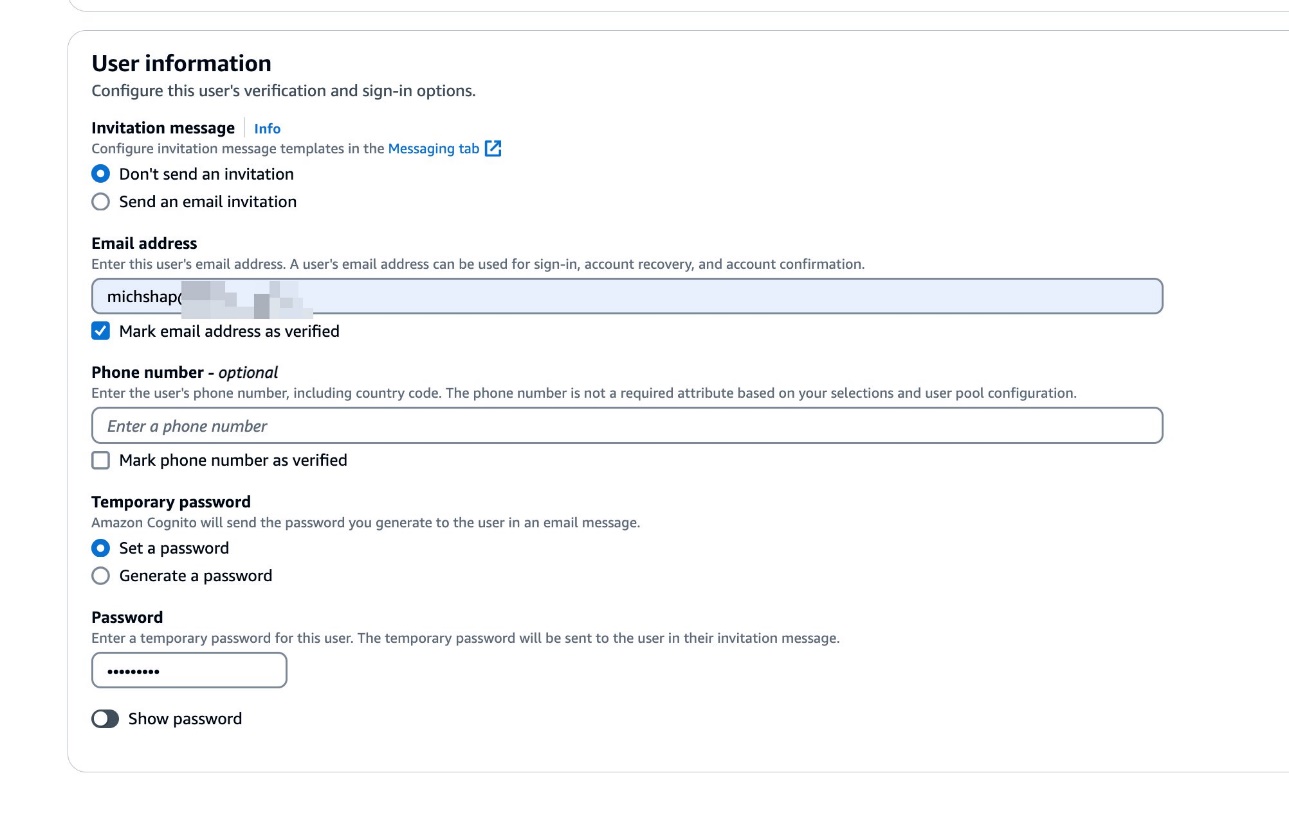
- On the consumer pool particulars web page, on the Customers tab, select Create consumer.

- Present your consumer info.
You’re now able to run the appliance.
Use the pattern serverless utility
To entry the appliance, navigate to the URL you saved from the output on the finish of the appliance publishing course of. Check in to the appliance with the consumer you created within the earlier step. You is perhaps requested to vary the password the primary time you sign up.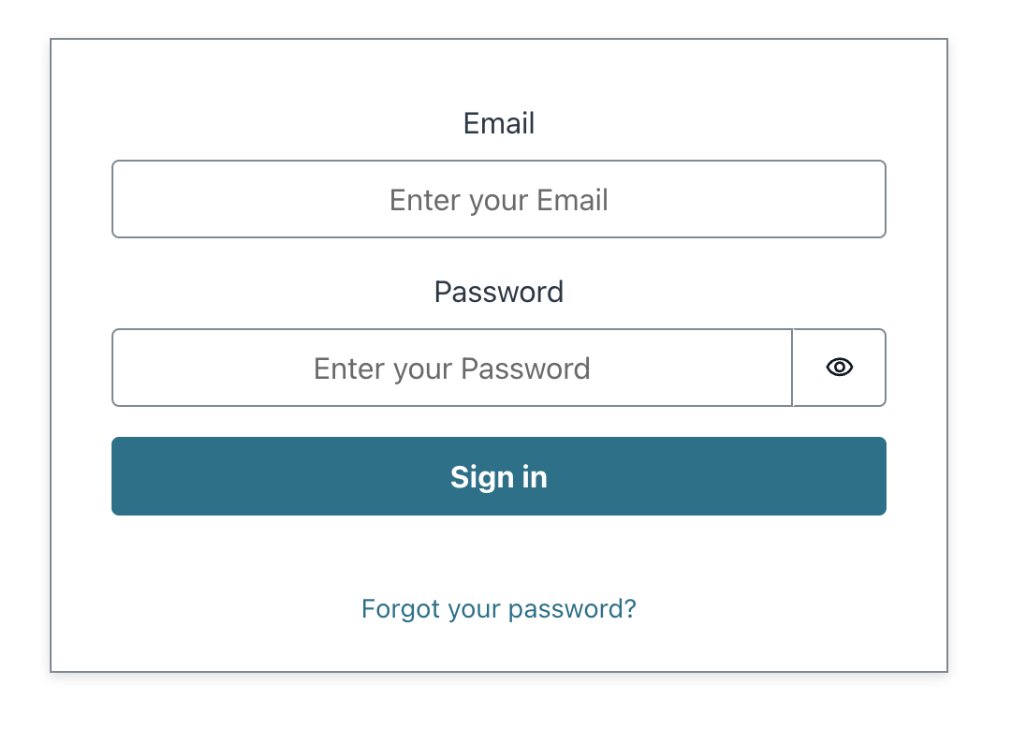
Use the Discuss button and maintain it when you’re asking the query. (We use this strategy for the simplicity of demonstrating the talents of the software. For folks with motor disabilities, we suggest utilizing a devoted button that may be operated with totally different physique components, or a particular key phrase to provoke the dialog.)
If you launch the button, the appliance sends your voice to Amazon Transcribe and returns the transcription textual content. This textual content is used as an enter for an Amazon Bedrock LLM. For this instance, we use Anthropic Claude 3 Haiku, however you possibly can modify the code and use one other mannequin.
The response from Amazon Bedrock is displayed as textual content and can be spoken by Amazon Polly.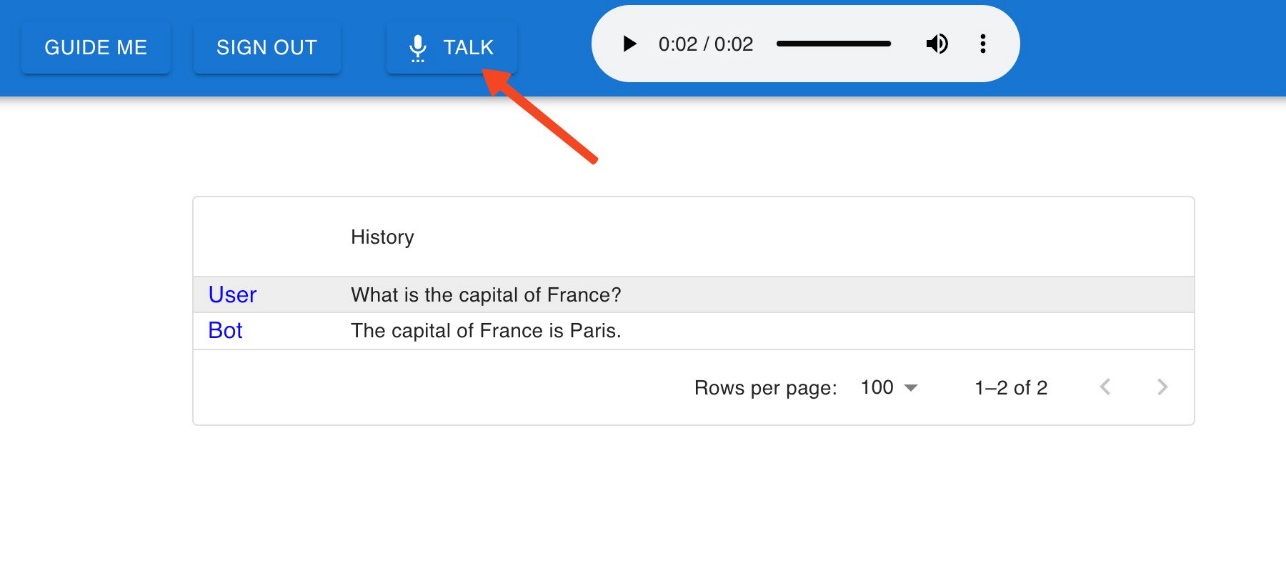
The dialog historical past can be saved. This implies that you would be able to ask follow-up questions, and the context of the dialog is preserved. For instance, we requested, “What’s the most well-known tower there?” with out specifying the situation, and our chatbot was in a position to perceive that the context of the query is Paris primarily based on our earlier query.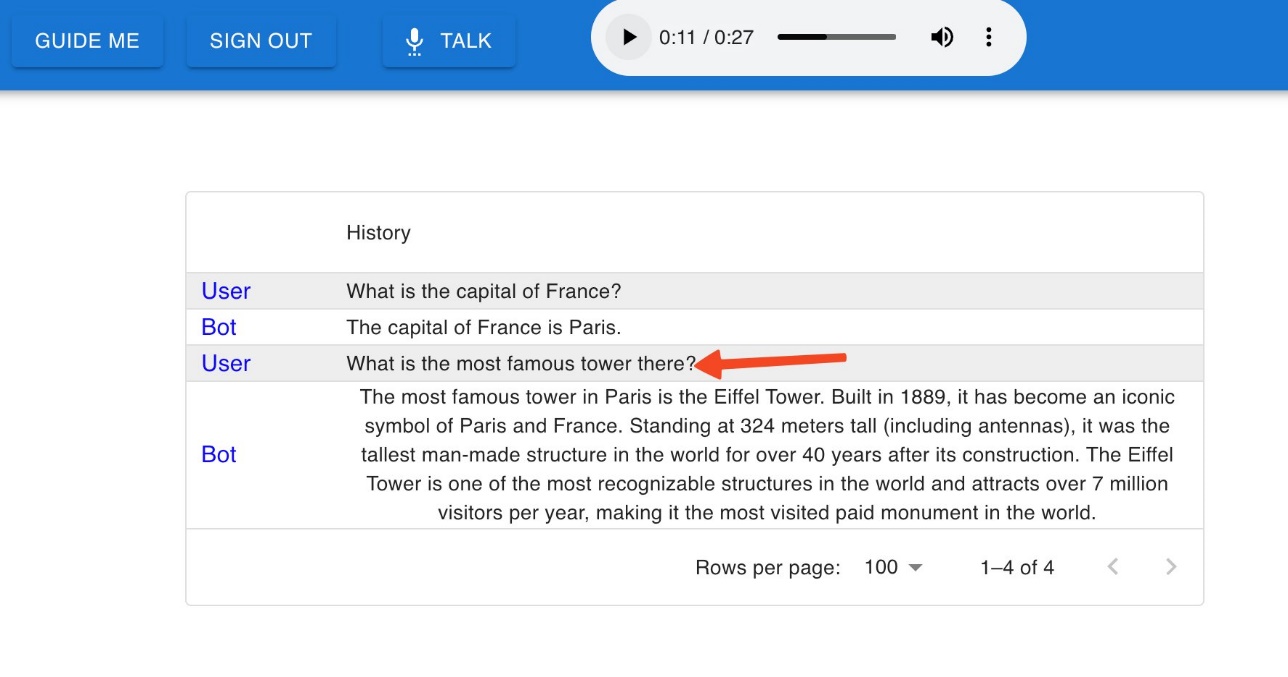
We retailer the dialog historical past inside a JavaScript variable, which implies that in case you refresh the web page, the context will likely be misplaced. We talk about protect the dialog context in a persistent manner later on this put up.
To establish that the transcription course of is going on, select and maintain the Discuss button. The colour of the button modifications and a microphone icon seems.

Clear up
To scrub up your sources, run the next command from the identical listing the place you ran the Amplify instructions:

This command removes the Amplify settings from the React utility, Amplify sources, and all Amazon Cognito objects, together with the IAM position and Amazon Cognito consumer pool’s consumer.
Conclusion
On this put up, we introduced create a totally serverless voice-based contextual chatbot utilizing Amazon Bedrock with Anthropic Claude.
This serves a place to begin for a serverless and cost-effective answer. For instance, you might lengthen the answer to have persistent conversational reminiscence to your chats, similar to Amazon DynamoDB. If you wish to use a Retrieval Augmented Technology (RAG) strategy, you should use Amazon Bedrock Data Bases to securely join FMs in Amazon Bedrock to your organization knowledge.
One other strategy is to customise the mannequin you employ in Amazon Bedrock with your individual knowledge utilizing fine-tuning or continued pre-training to construct functions which are particular to your area, group, and use case. With customized fashions, you possibly can create distinctive consumer experiences that mirror your organization’s model, voice, and providers.
For extra sources, seek advice from the next:
In regards to the Creator
 Michael Shapira is a Senior Answer Architect masking common matters in AWS and a part of the AWS Machine Studying neighborhood. He has 16 years’ expertise in Software program Improvement. He finds it fascinating to work with cloud applied sciences and assist others on their cloud journey.
 Eitan Sela is a Machine Studying Specialist Options Architect with Amazon Internet Companies. He works with AWS clients to offer steerage and technical help, serving to them construct and function machine studying options on AWS. In his spare time, Eitan enjoys jogging and studying the most recent machine studying articles.